Monday 31 August 2015

Death Company Drop pod - WIP

Hi Readers,

As promised (or threatened), I am beginning my even greater deluge of Death Company WIP pictures today. And I hope to have many more shots, particularly of completed models my the end of this week on next Sunday. If all goes to plan (so no) I should have a painted Death Company Drop pod, and 10-15 more panted Death Company, along with either a Chaplain in Death Company colours, a Sanguinary Priest or, cautiously, both of them.

But rather than looking to far ahead let me just give you a few pictures of the the Drop pod that I have been working on. This was bought of ebay and came with the outer shell and the inner shell built but separate with a load of sprue still attached so after filing it all down I gave it an undercoat of black and a heavy drybrush of eshin grey, this stage looks like the outer shell picture below:


As you can spot to the left of the picture I actually based the outside doors of the drop pod in mephiston spray before using tamiya tape to make a Death Company cross on all the doors before the black base coat. This was then drybrushed using eshin grey and looked like so:


I was absolutely certain I had taken WIP pictures of the interior as I was painting it, but evidently I did not or they weren't saved for some reason, but I have finished painting the interior of the drop pod, I used a fair amount of drybrushing for the overall aesthetic as I couldn't bring myself to line highlight the interior of  a vehicle that will be hidden from view a lot... But I'm quite pleased with the look of it anyway:


And in all of these pictures you can see my new modelling mat, huzzah!! The hazard lines were formed using tamiya tape again but a thinner version of it, I want to say 6mm? The tape is bloody excellent though I lost the will to live putting all those bits of tape on, it just got so dull and I always think drop pods have one less door than they do which is always demoralising when you realise there is another damn door to go... Bah, bah I say!!!

I am going to attempt some heat style weathering on the side of these which terrifies me as I feel I will muck it up, but smashing a few tutorials together I hope to produce a semi reasonable effect, and again it will spend most of it time with the doors down and I am rather gosh darn proud of those hazard lines!


Tune in tomorrow for hopefully the finished product and later in the week I hope to have the penultimate game in my narrative campaign up for your reading and viewing pleasure! It was a doozy!


Peace out,

Rob

Sunday 30 August 2015

Joining the 40K Addict - To Do List 2015/2016

Hi Readers,
As the big bold stamp above and the title of this post indicate, I am going to be joining 40K Addict, Dave Weston in his vowed To-Do list for the 2015-2016 season (I presume it runs from this sort of time either due to the British school calendar or possibly the British football season....). You can find details of this over at the amazing Confessions of a 40k addict Blog where Dave is currently constructing an immensely cool man cave in his garden. He is also on my blog roll so if you scout down there you should find his ramblings along with his incredible painting skills (Check out his tyranids!).

Essentially this is a vow in order to spur on productivity and also to shape the direction of my endeavours rather than just incessantly getting off track and doing random bits of projects such so that nothing actually gets finished (I've actually been pretty good with this since I started the blog thanks to my Narrative campaign with Stuart.)

So below is my to-do list for the year ahead!!!


Goals Before Blog Wars in November

1. Build 20 more Jump Death Company

2. Paint 35 Jump Death Company and 1 Death Company Drop pod


Goals Before the end of January 2016

1. Paint the remaining 20 neophytes for my Black Templars

2. Paint the 5 vanguard veterans for my Black Templars

3. Paint Grimaldus and his servitors


General Goals to complete at any time

1. Pick a new army to start that has synergy with my Blood Angels (probably space marine)

2. Buy and start painting said army (probably a mix of ebay rescue bids and new purchases)

3. Start converting mechanicum or Tau models out of all the bizarre models I have picked up with this in mind (includes evangelion figures and some warzone resurrection miniatures).

4. Attend 3 tournaments as opposed to the 2 I attend this year (would have been 3 if Fluffageddon had gone ahead!)


The last section of goals is obviously very open ended in many ways but I will expand upon them as I get to them with additional units added individually as they come, but quite hard to do when I haven't picked the army yet!!

Anyway, that's what I'm aiming for this season and some of it has already been started and I hope to share some with you in the coming week! I will apologise now, there will be a lot of Death Company pictures coming up (A LOT!).

For now, keep on hobbying.

Peace out,

Rob

Friday 28 August 2015

Death Company Army Builds And Tactics

Hi readers,

Today I'm going to have a quick run through the builds that I will be playing Death Company with and discuss the tactics that I would utilise with these builds along with their respective strengths and weaknesses. I'm not going to profess that I am an expert on any of this subject matter so if you disagree with something I say, please do comment below with your opinion as its always good to see how someone uses a unit differently (just try not to state your opinion as fact if you don't mind!).


Fun Army Build

So the list I am about to describe is more of a "fun" army build that utilises unique aspects of the Blood Angels with a focus on the Death company and their ability to be inherently tooled up ba***rds of destruction.

Firstly, I will be using the Baal Strike Force detachment in the Blood Angels codex. This is because marines are the most common army to encounter out there, so with all things being equal (such as weapon skill and strength without any special weapons) that additional point of initiative (providing you didn't perform a disordered charge) means you will strike first over almost all other marines and at the same time as almost all Eldar. This means that you will be facing less attacks back from marines and that you will actually get your chance to hit the wily xenos scum before dying. Obviously any I1 weapon like thunder hammers ignore this benefit.

So in this 1850 point list I will be taking the following:

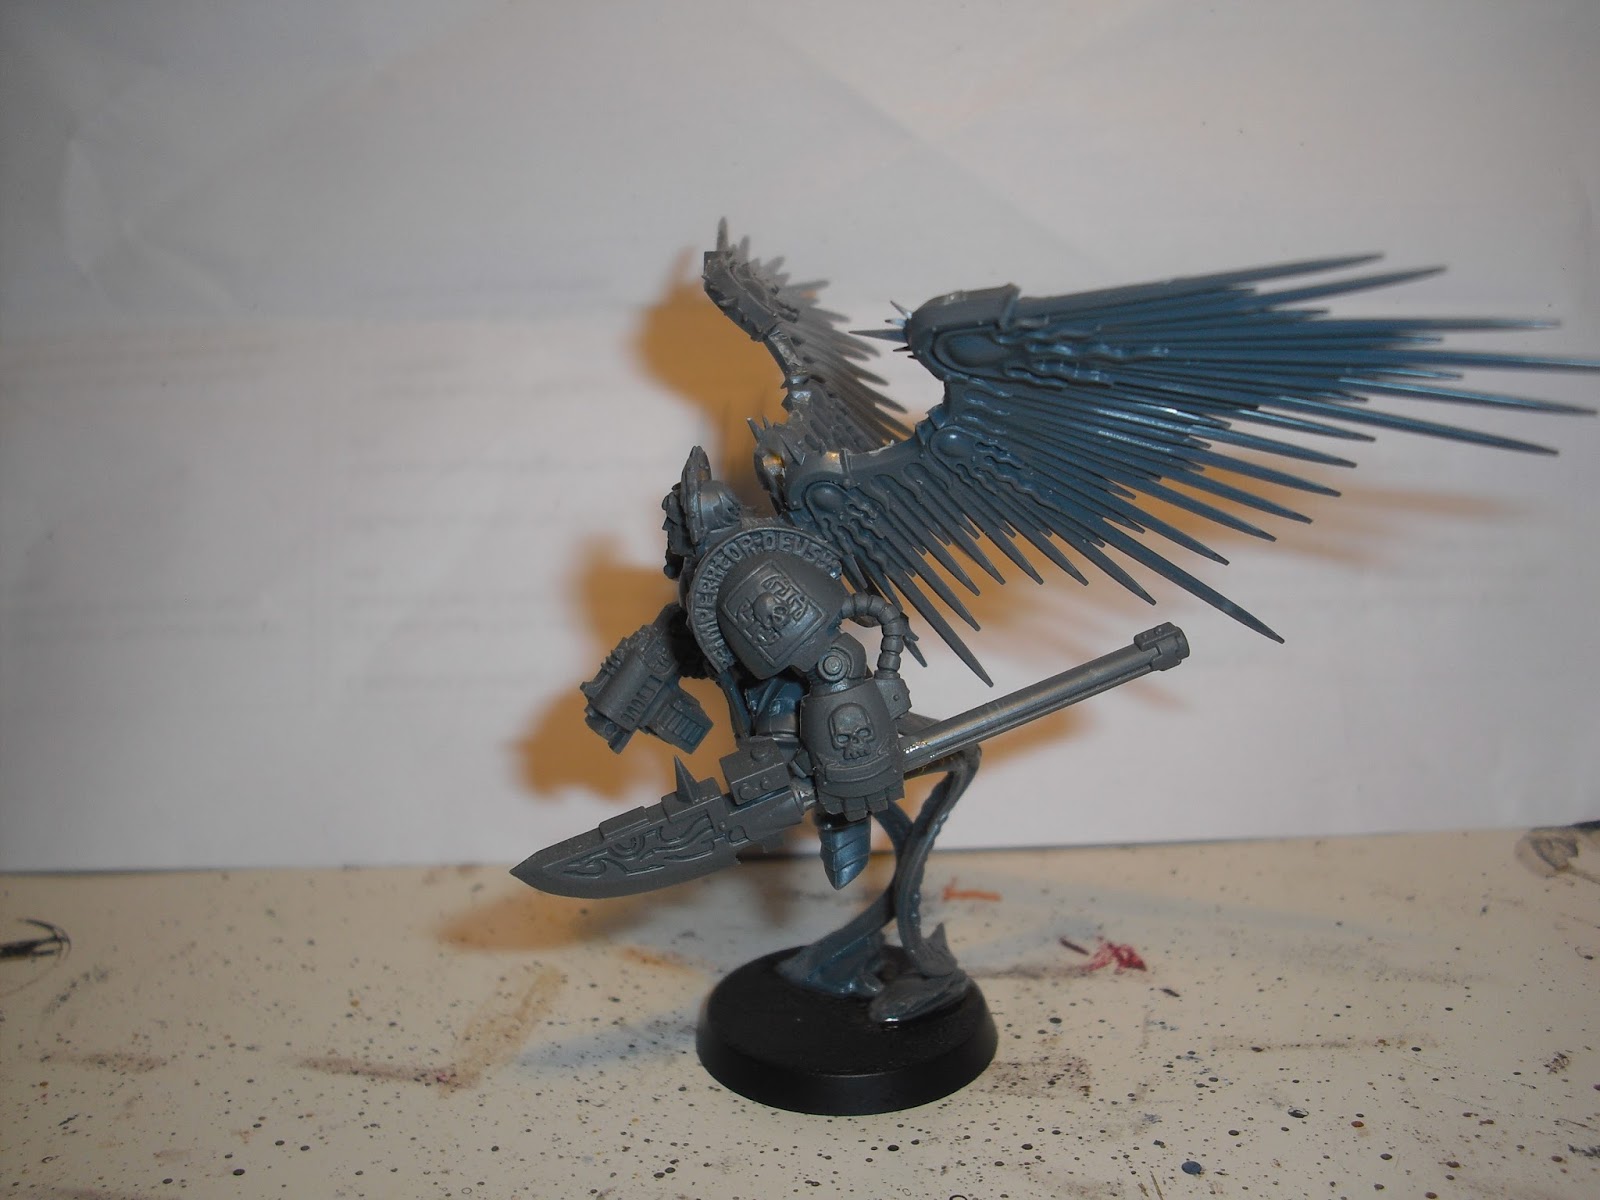
HQ - Astorath the Grim 

Elite - Lemartes, Guardian of the Lost

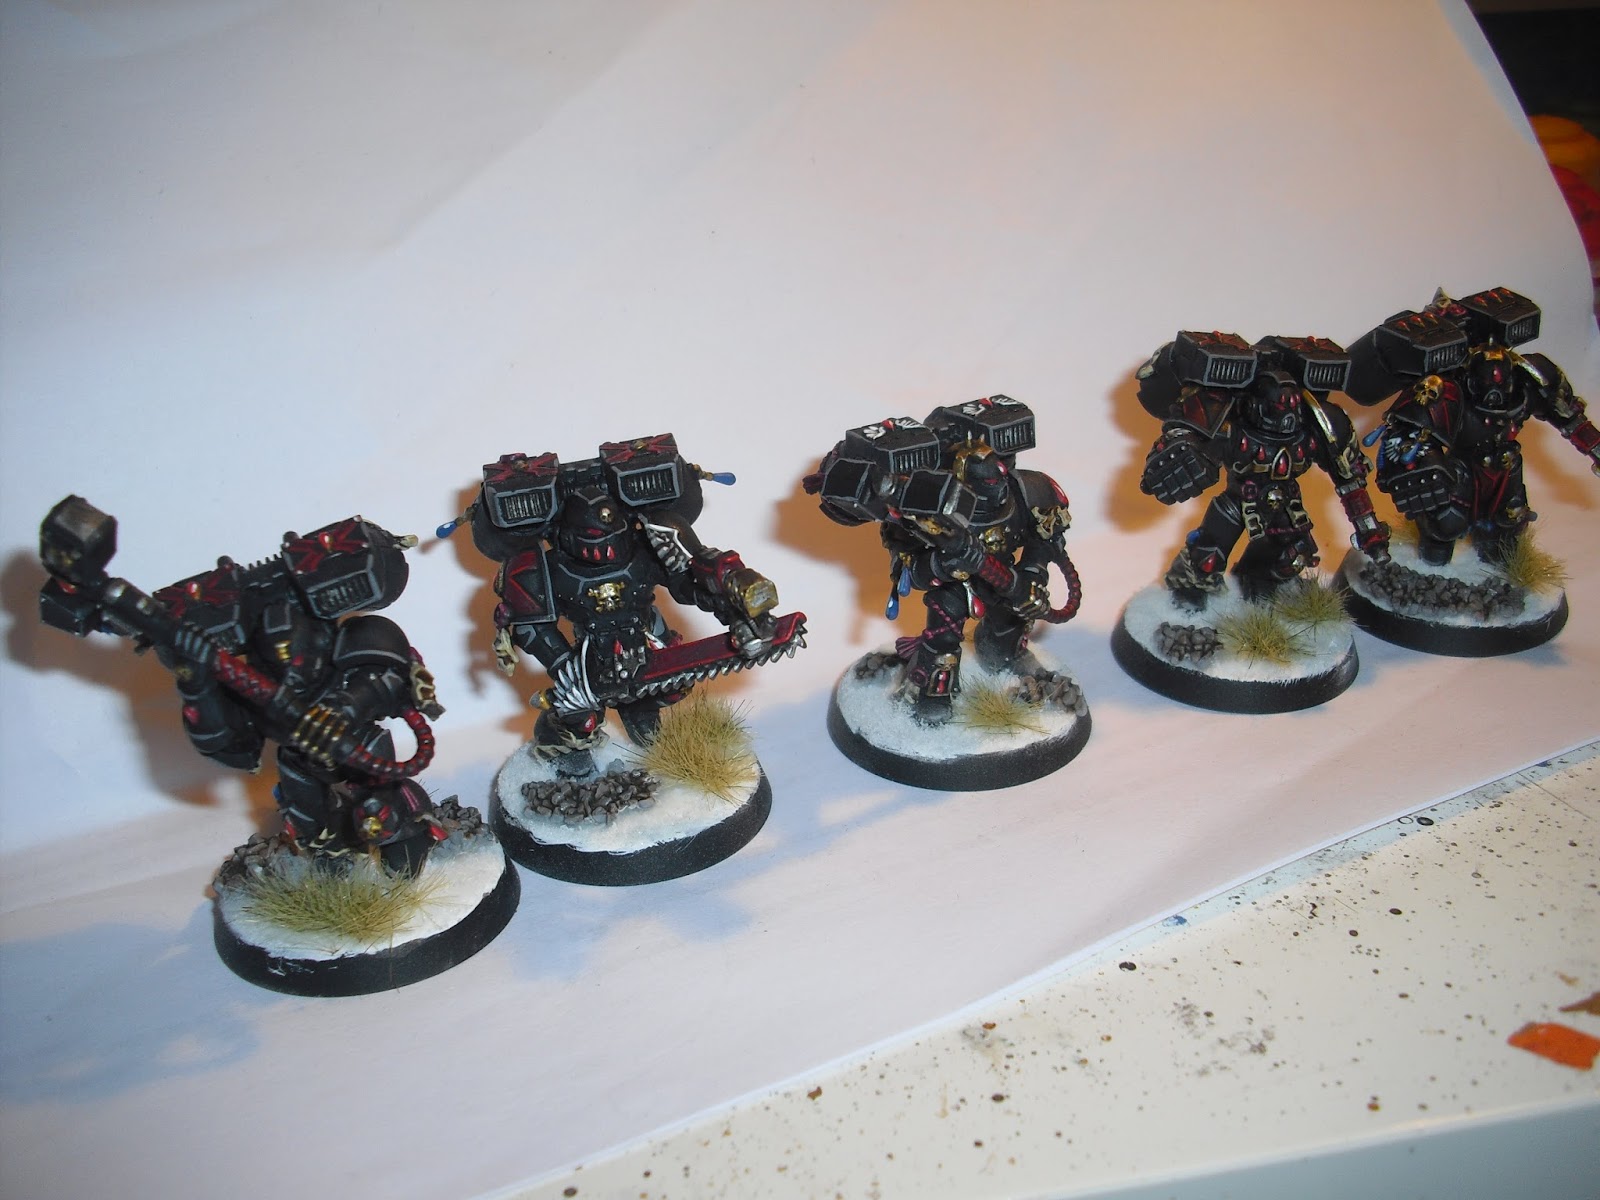
Elite - 10 x Jump Pack Death Company (4 x Infernus Pistol, 2 x thunder hammer, 2 x power fist)

Elite - 10 x Jump Pack Death Company (4 x hand flamers, 2 x thunder hammer, 2 x power fist, 2 x power sword)

Troop - Cassor the Damned

Troop - Raphen's Death Company

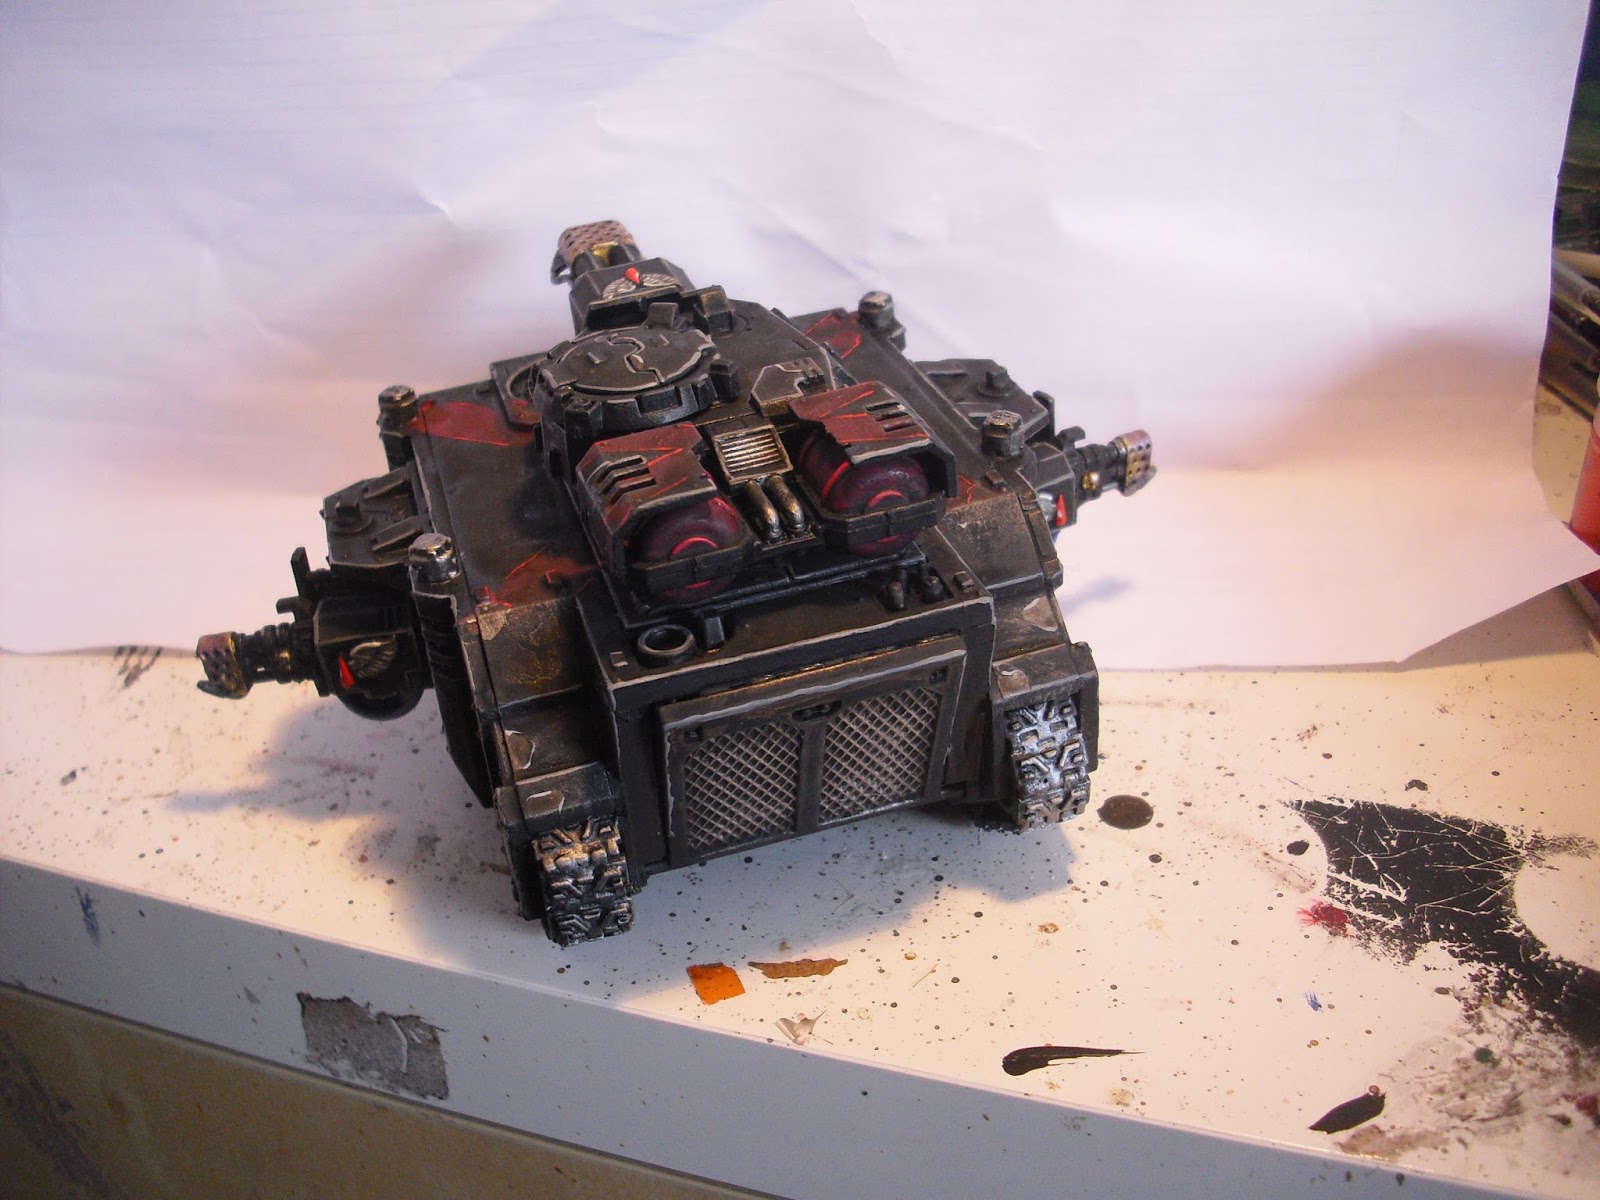
Heavy Support - Baal Predator (Flamestorm cannon and 2 x heavy flamers)

Heavy Support - Storm Raven ( lascannon, typhoon launcher, hurricane bolters)

Now obviously this has 2 very expensive units that are the heart of the army and they will make or break any game you play, it also focuses on these units being led by the buffering Astorath and Lemartes, but I will discuss that later in the tactics section. 


Fun Army Build Tactics

So this army relies heavily on two things. The first of which is the two large death company squads surviving, both to get into contact with the enemy, but also that anything swinging before initiative step 1 doesn't kill of those thunder hammers and power fists first and secondly the storm raven turning up in a timely fashion of sorts.

The Death Company squads have fire power to thin out cover camping squads (albeit at strength 3 but there are 4 of them which makes up for it) and take on 2+ armour save (if within 6 inches) and obviously you need to direct these to their targets as appropriate with the infernus pistols going for either mech or terminator equivalents. The flamer squad can still deal with 2+ saves and mech thanks to the thunder hammers and power fists but softening something up with shooting is always a big bonus. Hug cover and get in the enemies face as fast as possible, these guys belong in combat not being shot at. 

Raphen's death company are designed to hide and claim objectives, they are too small to be a threat and will die very easily to sustained fire power, so keep hidden and score points is the name of the game.

Cassor the damned can run in the Storm raven, he is an absolutely superb mulcher of elite units for 2 fantastic reasons. Firstly he can put out 6 attacks on the charge (3 base + 1 for 2 x CCW and +2 for rage) and these will instant death anything that is T5 or lower because they are S10 (maxes out at 10) or S13 on the charge with furious charge EDITED following Westriders points in comments :). So multi wound models will fall beneath his wrath leaving only invulnerable saves to keep them alive. Secondly, he is a character. This allows him to challenge anything initiative 4 and strike at the same time, or anything initiative 5 on the charge because of the detachment. He is a character slayer and can bag you vital points or kills because of it.

The Baal predator is used to manoeuvre the enemy around to avoid its flamer templates and thus aid in the Death Company squads getting into combat as they are hugging cover and closing as rapidly as they can. 

Finally we can consider the benefit of Astorath and Lemartes. Both of these guys have zealot, so you will be re-rolling all failed to hit rolls in the first round of combat. This is huge with death company and will allow you to deal out a huge amount of hits immediately. Astorath also has Liturgies of Blood which allows the unit to re-roll failed to wound rolls in the first round of combat. Whichever squad you decide to place him with, they will murder everything. Astorath hits at I1 but will instant death anyone not eternal warrior on a to wound of a 6, but he only has a 4+ invulnerable so is susceptible to instant death himself. Lemartes is a great horde thinner with his +2 strength AP 4 6 attacks on the charge. 


"Competitive" Army Build

So this list has an actual "competitive" focus about it, though I frame the word in quotation marks as the events I attend are, in general, fairly heavily comped and so not really a measure of true competitive meta as they actively encourage a more friendly environment that doesn't ban Win At All Cost (WAAC) lists but certainly limits and frowns upon them.

That being said this 1850 force can deliver a lot of nastiness itself if played well. It also relies on the Baal Strike Force Detachment though this takes advantage not only of the extra point of initiative but also the extra elite slot that it grants allowing you to really max out on the Death Company goods.

HQ - Captain (Artificer amour, storm shield, Valours edge, Veritas Vitae, Jump pack and melta bomb)

Elite - 10 x Jump Pack Death Company (1 x thunder hammer, 1 x power fist, 1 power sword, 1 x hand flamer, 1 x infernus pistol)

Elite - 10 x Jump Pack Death Company (1 x thunder hammer, 1 x power fist, 1 power sword, 1 x hand flamer, 1 x infernus pistol)

Elite - 10 x Jump Pack Death Company (1 x thunder hammer, 1 x power fist, 1 power sword, 1 x hand flamer, 1 x infernus pistol)

Elite - 10 x Jump Pack Death Company (1 x thunder hammer, 1 x power fist, 1 power sword, 1 x hand flamer)

Troop - Cassor the Damned

Troop - Raphen's Death Company

Fast Attack - Drop pod (storm bolter)

So as you can see, a much more balanced build that repeats the same squad build 4 times (with the exception of one infernus pistol) incorporating both duality and redundancy across the army. The one big glaring omission in this list is any ground to air or air to air attacking capability, but this is a deliberate choice and has thus been equipped appropriately as I will discuss below.


Competitive Army Build Tactics

This army does away with any mechanised vehicles beyond the drop pod and relies entirely on multiple threats with jump packs moving up the board as fast as possible to engage the enemy.

The captain is quite expensive but comes with a few handy trinkets. The most important of these is the Veritas Vitae that allows you generate an additional warlord trait from the strategic table. So you can have two from that table if you wish or chance your luck on two different tables. A good roll can be a game winner. He also has Valour's Edge, an at strength and at initiative AP2 power sword, however this is strength 5 and initiative 6 on the charge in this detachment so it can be very good. The shield is for survival and the melta bomb allows him to tackle armour as well. 

The Death Company Squads are tool kits. Ignores cover templates? Check. Melta gun? Check. AP2 weaponry at x2 strength for 2+ saves and armour? Check. Power sword for at initiative AP3? Check. 7 other guys pumping out 35 attacks on the charge at strength 5 PLUS the possibility of hammer of wrath attacks? Mother flipping check all over that.

Four of these squads ensures that either you will lose a few from all or maybe one whole squad. Remember these guys have Feel No Pain so they can shrug off a lot of Strength 7 or lower shots a third of the time enhancing their survivability. Utilise the cover and punch everything to death.

Raphen's Death Company have exactly the same role as described above.

Cassor the Damned now comes in a drop pod on the first turn, he is designed to be an angry distraction in the backfield, maybe score an objective first turn BUT also don't forget he has a meltagun (12 inch range so 6 inch for melta) and so can help take out some armour in the enemies back line as well. 

As mentioned in the build section, this army lacks any anti-flier capability unless they are in hover mode. But the point of this army is to be engaged in combat thus preventing them being shot at. These guys have a 12 inch move and up to a 6 inch run on the first turn and if the enemy has moved towards you or has been forced to as they need to claim maelstrom objectives then a turn 2 charge (or if you're lucky a turn one charge if you went second) is very much achievable. 

Null deployed armies like a Nemesis Strike force will hurt this army but then you should be facing off against an equally elite army so it balances itself somewhat as long as you take down the Dreadknights early on.


Conclusions

Anyway, well done if you have made it through the wall of text to get to this point! I do appreciate anyone reading all the way through my drivel on tactics in a game that I play narratively more often than not but I do attend tournaments on an at least once yearly schedule and don't do to badly at them (that's a lie!).

I would love to hear anyone else's experience of using Death Company heavy lists or just shared tactics for relatively small elite armies as well, I love to swap and debate ideas, just be friendly about it (partly because I can be very slow sometimes...).

Let me know if you enjoyed this article and if there are any other tactics either as part of my armies (past and present or even future) or just general theory hammer tactics that you would like to see.

Thanks as always and

Peace out,


Rob

Thursday 27 August 2015

Baal Predator ahoy! And Astorath the Grim finally based.

Hi readers,


So I have the penultimate game in my running narrative campaign today and this one isn't going to be a custom mission but rolled up from the maelstrom missions instead. Its going to run at 2000 points and I am now using my Blood Angels after all of my Templars were slaughtered to a man! Well to two men, but close enough!

Unfortunately I didn't have quite enough points painted up when I counted them up last night and even then I will have a very low model count with expensive models being used and lots of characters as well.. so I don't fancy my chances!


Baal Predator (mmm toasty)

In order to make up the points without resorting to resurrecting some Black Templar marines from the warp beyond I got down to the grind stone and smashed out my Baal Predator tank. Painted much in the same way as my Storm raven to be a dirty vehicle used frequently in battle, I think I overdid the initial dry brush a little bit but its worked out OK I think. I also attempted a bit of battle damage weathering which is a bit meh, but something I very much want to work on and can awlays paint over black if needed. Not too shabby for an evenings work anyway!


The model was an ebay rescue, which whilst mostly put together well, does have the bizarre back to front rear hatch which I could not fathom how that came about...

As with most of my Death Company I still really need to give it all one extra highlight of administratum grey, but it looks good enough in its current form to hopefully toast some Orks with them there flamers today! The winner of this maelstrom battle will be allowed to choose their deployment area, night fighting and to go first or not with no opportunity to seize in the final battle of this campaign. Tasty!

As usual please keep an eye out for the battle report next week after I've sorted through the pictures and gotten it written up in a narrative. And in a fortnight there will be the big showdown, which will be 2500 points of Blood Angels versus Orks entrenched in an Ork town barricade ready to fend off my attack!


Astorath and Base Adaptors

Finally I actually received my base adaptors for 25mm to 32mm size and applied them to Astorath the Grim, Redeemer of the Lost. Pictures!!


Overall, supremely underwhelmed with them, I had expected them to be a much better fit overall and they were all too large to glue on snugly so I had to cut small bits of each end to get them to fit around it giving a nice contact on the 25mm base. You can see from the pictures below how they leave a gap if you fit them too a 25mm base without cutting them.


He looks good overall in the end and fits in nicely now with his increased base size, but if I had a lot to do I would just tear them off the old bases and stick them on actual 32mm bases. But for the odd character they are OK I suppose. 6/10 overall.


Anyway, I have next week off to expect a lot more death company WIP shots and also some musings on how I plan to field them and tactics for getting the most out of them!

Peace out,

Rob

Monday 24 August 2015

Completed Death Company x 5

Hi Readers,

Today I'm just going to show case you my recently completed 5 Death Company. These will actually receive a final highlight of administratum grey on the uppermost black points eventually, but I can't stomach any more grey highlighting right now so I plan on updating all my Death Company squads in one fell swoop after I've got another 5 done! 

That will leave me with 10 Death Company to paint and my Baal Predator to have my Death Company List completed. I still have plenty of Blood Angels to pain on top of that and also my Black Templars to complete as well, so I have a long long way to go and I'm sure I will buy bucket loads more in the mean time... Le sigh!

Pictures!!


Thoughts always welcome!

Peace out,

Rob

Sunday 23 August 2015

Converted Sanguinary guard from Age of Sigmar - Completed!!

Hi Readers,

So I have been plugging away at converting my Sanguinary Guard from the Age of Sigmar Prosecutors using all the little bits and bobs that I've had floating around and they are finally done! The unit is equipped with 2 x encarmine swords, 2 x encarmine axes and a banner and power fist, its not the most competitive build but from a modelling perspective it filled all the fun ideas I had and that ticks more boxes for me than being competitive!

I like the idea that these are personalised suits fitting and choosing the bearers over time,moulding to their fighting style and personality. This stems from a David Gemmell novel I love (Knights of Dark Renown) and also from the idea of the Sanguinary Death Masks moulding to the wearers face after death. One of my favourite pieces of Blood Angels lore if I'm honest.

Today has been very dull weather wise and as much as I try I've not been able to get some decent pictures out so I apologise for the quality in advance!


In other news I have finished off my second 5 Death Company marines which is half of a squad of 10 and I will get those posted up in the coming week. Later today I will either start on the other 5 Death Company or perhaps a vehicle being either my Baal Predator or a drop pod.

Comments always welcome,

Peace out,

Rob

Thursday 20 August 2015

Battle for the Relay - Emperor protect us! Templars vs Orks

Hi Readers me again,


Its been a pretty post heavy week so far so hopefully I'm not inundating people with tripe but actual decent content! Today we have the concluding half of my last narrative battle. We have already seen the Orks run rampant through the substation tunnels, over running and slaughtering the brave Templar task force sent to fend them off. Will their devious machinations prove the undoing of the defence force above? Or will they have won the battle but lost the war?

The second game in this scenario was a custom designed one. It was based on a 4x4 table with small 750 points forces, the remnants of the Templars versus the fast pursuing horde of Orks fresh from their victory in the battle of the hive ruins. The Templars were deployed in the centre of the board and the Orks would go first and come on from whichever edge they chose too, encircling the Templars and going for the kill.

The central column on the table housed the last living astropath on the planet and he had to be protected at all costs to ensure speedy reinforcement of the planets defence. If he was held by the imperial forces at the battles close then the Blood Angels would be granted +1 to their reserve rolls in the coming battles, but should he fall the Angels of Death would receive a -1 to their reserve rolls instead. 

This battle started after turn three in the the tunnels had been completed so that the winner in the tunnels actually got to effect the game above them in the earlier turns. This was the dawn of a bloody battle, who would hold the upper hand at the close of day?

 The Templars have their back to the wall, soread in a defensive ring around the comms tower, even the neophytes of the chapter have been pressed into action in this time of dire need, the lone vindicator that survived the previous battle looks on in anticipation...

 The Emperor's Champion stands proudly, his faith is his shield and the Emperor's will prevails.

 The air is sliced as the buzzing blades of the Deff Koptas flank the stalwart templars, a wayward rocket rocks the vindicator but he will still have his say with his booming gun..

 Three more flying mad Orks come from the front but their manic shooting either miss or smash into the siege shield of the mighty blessed Vindicator

 The Ork force is fully mobile from its hot pursuit with two squads of boys and some burna boyz (far left) come screeching to a halt in front of the comms relay and lay down a hail of bullets, but as the wagons jerk to a stop only a few bullets make their mark and 2 neophytes fall...

 The deffkoptas look on and await the Templar response

 The Templars have withstood the brute force with a hull point and 2 neophyte casualties to their name. Retribution would be theirs!!

 The Demolisher cannon shook and boomed! And took a single glance on the Burna Boyz trukk with a 1... I forget to roll two dice here and this was a big mistake as I could have blown it up and taken some of those boyz out...

 Bloody Orks...

 A withering hail of fire wrecks the trukk (its a trukk honest!) but the melta can't explode it and so the boys retreat behind it and make a charge all but impossible, this was the major key moment in the battle.

 The smaller 10 man templar squad loses a man to overwatch and in the shooting face the sergeants plasma pistol blew his head off (face palm), but they make it into battle and with the rage of losing 1 of their number they thrash the orks!

 In a desperate squabble the buzzclaw ork takes down his brethren and stands alone against the zealous Templars

 The cowardly greenskins decide that discretion is indeed the better part of valour...

 In response to the best efforts of the Templars the Orks dismount as the Warlord strikes his chest and cries high into the sky.. WAAAAAAAAAAAAAAAAAAAAAAAAGH!!!

 There is not safety, no place to hide, but to stand firm and face the green tide


 The battle lines clash!

 All foes are met!

 The line must hold! A further two neophytes fell in the shooting phase meaning the Templars were prepared to counter-attack and strike back with righteous fury!

 Meanwhile the buzzclaw was cleaved in two by the power axe

 The vindicator, having survived the onslaught of the last battle, is at last brought low by the dread deffkopts..

 The Emperor's Champion gallantly strode to the fore of battle and hacked 2 wounds from the Warboss, but as he raised his sword to end his life, the power klaw broke his guard and plunged through his torso, his lifeless form sliding to the ground...

 However, the templars in their defiance won the combat and 4 Orks perished due to in fighting and combat was held...

 On the counter, the Templars, fresh from victory against the other deffkoptas sweep into the second squad and take a single wound off for the loss of one marine. The deffkoptas fail to leave combat with their mobility and are locked hard against the chassis of the vanquished tank


 The templars prepare themselves for another round of bloody combat

 Despite their bravery and amid good losses from the orks, the beaten Templars retreat further towards the comms tower, desperate to protect the Astropath inside.

 Further shooting fells a neophyte and combat is met once again, the grouond lies slick with red and green blood. But the Templars fall.

 So few remain from both sides, but the remaining templars are caught up and cannot make their way to the tower to defend the feeble psyker within!

 In the distance a great rumble is heard from beneath the ground as an almighty explosion occurs! Fearing the blast will be the end of them, the Templars brace themselves, but they are mistaken!

 The blast erupts beneath the burna boyz trukk taking another hull point off it and leaving it sunken amid rubble with movement a great danger now.

 The rmaining boyz climb the tower and the warboss full of confidence rushes to finish off the final marines, but is swiftly met with a power axe to the face! Crushing his skull as the final marines decide to prepare and make good their escape.

Few survived, but the astropath was not among them as the final 6 boyz run amok in the tower. The Templars had fallen and the Angels would find only death waiting for them...


Conclusion

This was a very fun game to play with a custom scenario and there was a lot of valiant combat all over the place and some brutal Ork kunning to take the day at the end. If I had blown the burna boyz up or have got the charge against a single squad of Orks off to take them down piecemeal I may have been able to hold, but weight of numbers finally pulled through and I just couldn't bring them down. Losing the Emperor's Champion to a failed 4+ invulnerable was also a shame as he did well to take 2 wounds off the warboss, but no 6's to wound which would have been instant death.

I hope you enjoyed this report anyway! The next game will be a maelstrom game, though we haven't picked one yet I think contact lost would be very appropriate!

Till next time guys and gals,

Peace out,

Rob